
こんにちは、はな夫(@logicalifer)です。
RaspberrypiをBluetoothキーボードとして振る舞えるようにします。
参考にしたのは、下記のサイトです。ただし、情報が少し古いので、2020年11月時点のものに合うように修正していきます。
①自作キーボードを作成した方の記事
②①で参照していたページ
③②のコメント欄にて紹介されていた、Python3への修正版のページ


②のソースコードをベースに、③で紹介されている修正内容を反映していきます。
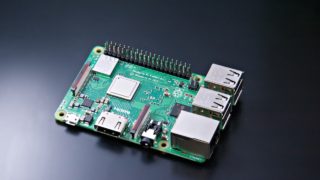
使用した機材はRaspberry pi 3 model B+です。下記でインストールしたものになります。
環境の準備
③で紹介されている内容を実施してきます。
まずは BlueZがインストールされているか確認します。参照先では、5.43でしたが、5.50でも動作することを確認しました。
bluetoothctl -v
bluetoothctl: 5.50
次にRaspberry Piを最新バージョンにあげます。
sudo apt-get update
sudo apt-get upgrade
sudo apt-get dist-upgrade
次に必要なライブラリをインストールします。
sudo apt-get install python3-dbus
sudo apt-get install python3-evdev
作業フォルダを用意します。(ここはお好みです。)
mkdir work
cd work
②のページで紹介されているGithubからコードをダウンロードします。作者に感謝します。
git clone https://github.com/yaptb/BlogCode.git
③のページで紹介されている修正版をGithubからダウンロードします。先程とは別のフォルダに一時的にダウンロードします。
mkdir tmp
cd tmp
git clone  https://gist.github.com/ukBaz/a47e71e7b87fbc851b27cde7d1c0fcf0
cd a47e71e7b87fbc851b27cde7d1c0fcf0
ダウンロードした修正版のソースコードで、オリジナルのソースコードを上書きします。
cp btk_server.py ../../BlogCode/btkeyboard/server/
cp sdp_record.xml ../../BlogCode/btkeyboard/server/
cp kb_client.py ../../BlogCode/btkeyboard/keyboard/
cp keymap.py ../../BlogCode/btkeyboard/keyboard/
org.yaptb.btkbservice.confは、下記のコマンドを実行します。(元記事通りに実施しているので、何をしているかよくわかっていません。。。)
sudo cp org.yaptb.btkbservice.conf /etc/dbus-1/system.dさらにUSBのClassを書き込みます。/etc/bluetooth/main.confのClassの部分を変更します。
sudo emacs /etc/bluetooth/main.conf
Class = 0x002540実行
下記の通りに実行します。ターミナルは2つで実施します。
ターミナル1:(****の部分は各プロセスで異なるものが表示されます)
cd ~/work/BlogCode/btkeyboard/server
sudo service bluetooth stop
sudo /usr/lib/bluetooth/bluetoothd -P input &
[1] ****
sudo python3 btk_server.py
Setting up service
Setting up BT device
Configuring for name BT_HID_Keyboard
Configuring Bluez Profile
Reading service record
Profile registered
Waiting for connections
Waiting for connectionsが表示されたら、相手側でbluetoothデバイスの検出を実施します。BT_HID_Keyboardが見つかったらペアリングを開始します。成功すると下記が表示されます。(**の部分はMACアドレスなので、機器次第です)
**:**:**:**:**:**: connected on the control socket
**:**:**:**:**:**: connected on the interrupt channel
ターミナル2では下記を実行すると、Raspberrypiに接続されたキーボードの内容が相手機器に入力されるようです。(自分は試していません)
python3 kb_client.py任意のキーコードを送信する
任意のキーコードを送信できるようにします。これにより実機のキーボードが無くても、手持ちのキーボードに無いキーの入力も接続先の機器に送ることができます。
③の記事のスレッドで、iOSのスクリーンショットを取るための議論がされていた部分を参考にして、sendKeycode.pyというコードを下記のように作成しました。
import os #used to all external commands
import sys # used to exit the script
import dbus
import evdev
import keymap
import time
from time import sleep

HID_DBUS = 'org.yaptb.btkbservice'
HID_SRVC = '/org/yaptb/btkbservice'


class SendKeycode:
    """
    Send the HID messages to the keyboard D-Bus server for specified button
    """
    def __init__(self):
        self.bus = dbus.SystemBus()
        self.btkobject = self.bus.get_object(HID_DBUS,
                                             HID_SRVC)
        self.btk_service = dbus.Interface(self.btkobject,
                                          HID_DBUS)

    def popinSendKey(self, send_string):
        targetCode = int(keymap.keytable[ send_string ])
        targetKeys = [161, 1, 0, 0, targetCode, 0, 0, 0, 0, 0]
        all_keys_up = [161, 1, 0, 0, 0, 0, 0, 0, 0, 0]

        self.btk_service.send_keys(targetKeys)
        time.sleep(0.001)
        self.btk_service.send_keys(all_keys_up)

# original thread's class
class CameraRemote:
    """
    Send the HID messages to the keyboard D-Bus server for the volume-up button
    """
    def __init__(self):
        self.bus = dbus.SystemBus()
        self.btkobject = self.bus.get_object(HID_DBUS,
                                             HID_SRVC)
        self.btk_service = dbus.Interface(self.btkobject,
                                          HID_DBUS)

    def take_photo(self):
        volume_up = [161, 1, 0, 0, 237, 0, 0, 0, 0, 0]
        all_keys_up = [161, 1, 0, 0, 0, 0, 0, 0, 0, 0]
        self.btk_service.send_keys(volume_up)
        time.sleep(0.001)
        self.btk_service.send_keys(all_keys_up)

    def take_screenshot(self):
        pwr_and_vol_down= [161, 1, 0, 0, 102, 238, 0, 0, 0, 0]
        all_keys_up = [161, 1, 0, 0, 0, 0, 0, 0, 0, 0]
        self.btk_service.send_keys(pwr_and_vol_down)
        time.sleep(0.001)
        self.btk_service.send_keys(all_keys_up)

if __name__ == '__main__':
    #cr = CameraRemote()
    #cr.take_photo()

    if(len(sys.argv) <2):
        print ("Usage: send_string <string to send")
        exit()

    print ("Setting up Bluetooth kb emulator client")

    skc = SendKeycode()

    string_to_send = sys.argv[1]

    print ("Sending " + string_to_send)

    skc.popinSendKey(string_to_send)

    print ("Done " + string_to_send)
引数にキーコードを示す文字列を指定して送信することになります。キーコードはkeymap.pyで定義されているものを指定します。下記のように実行すると、キーボードで「A」を押したのと同じことになります。
pi@raspberrypi:~/work/BlogCode/btkeyboard/keyboard $ python3 sendKeyCode.py KEY_A
コメント